Monday, November 30, 2009

Wreath Instructions

In my last blog entry I showed a wreath I had made for the current BASB challenge. I also posted this on the BASB blog and the Studio Calico message board. I received a couple requests to show how I made this. First, I think I need to admit that this isn't an original idea I came up with. I had seen a wreath similar to this a couple of years ago at a local shopping center. That one was the size of my house. Seriously. Since I don't have access to paper that large or a place to hang one that large I mini-ed it.

Here we go.

You will need:

4 or more pieces of 12 x 12 pattern paper (depending on how many paper patterns you want)
2 - approx. 4" circles of cardboard
Scrap pieces of paper to cover cardboard circles
Adhesive
Glue, like Zip Dry
Stapler
Ribbon


1. Cut each sheet of 12 x 12 paper into quarters. Each quarter will measure 6"x6". Each of these quarters will be be cut down to resemble the photo below - basically a triangle with a curved bottom. After you cut one use that one as a template for the others. The wreath I made is made up of 15 cones, so you will need to cut at least fifteen of these. Your wreath may differ depending on how tight or loose you roll your cones and the size of the disk you are adhering it to.


2. This is the tricky part and no matter how much I explain it will not be enough. Just practice and I think it will eventually come to you. Nice cop out from me, right? LOL! I will try my best. Working with one of the "triangles" use a stylus and score a small line (1/2" long) from the tip. This will help a bit with keeping the cone end pointed when rolling. Run a line of adhesive along one edge. You will begin rolling from the edge that does not have the adhesive. Just experiment with rolling it. You can roll it as tight or loose as you like. This will effect the number of cones you will need for the wreath. Once rolled press edges to firmly adhere. I then staple it once on the edge to ensure it will not "pop" apart.


3. The cone will eventually look similar to the photo below. If it doesn't, either re-try or realize you may have created you own type of item to make a wreath. No one said it had to look remotely like the one I did. :o)


4. Cover both sides of one of the 4" cardboard circles with scrap pieces of pattern paper. Punch a hole 1/2" from the edge. This will be used for hanging the wreath.

5. Lay out the cones on the covered circle points meeting in the middle staple adhered sides down. Once you find the pattern layout you like start picking one cone up one at a time and squeezing a line of glue on the covered circle. Adhere cone to circle. Repeat for all. I went crazy with the glue and when all cones were glued to circle I squirted a bunch of glue on top of all the tips. More is better, don't you think? ;o)


6. Once completely dry turn wreath over you will now string ribbon through the hole. It will be a little tight. I used thin ribbon and a sewing needle with a large eye and eventually wiggled it through.

7. Finally, you will use your imagination and make a medallion for the front of the wreath. I used the other cardboard circle and cover it with patterned paper. Your creative, so I won't go into details. Just do what you wish, but remember when you adhere it to the wreath to hold the wreath by the ribbon to find the right angle to attached the medallion. Yeah...I failed at that the first time. I used Zip Dry to attach it and I weighted it down with a pile of punches.


8. When done it should look something like the photo below. If it doesn't, share with me. I would love to see what you "invented".


I hope I explained this well enough for you to read between the lines and figure it out. I just happen to stink at trying to explain things. You probably figured that out five steps ago. LOL! Good luck!

Saturday, November 28, 2009

BASB Project Challenge


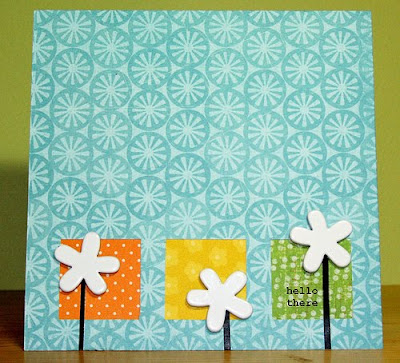
Anne's BASB challenge has been posted for over a week, but here I am late for the party. I started putting together a recipe box for the challenge, but it is sitting unfinished on my desk. It needs some oomph and I am short on oomph findings, so I made this instead. I like it. First of all, it goes along with my current organizational challenge. You know...getting rid of the overstock that is depressing my mojo. I used a bunch of paper, because once I made one I then made two more. Secondly, they are quick and easy. Everyone knows I am all about quick and easy. Well, maybe not everyone, but enough know it. So that is that....

If interested, even though I am late in posting there are still plenty of days left in the challenge. You have until December 3rd and the winner will be chosen on December 4.

Thanks for stopping by!
Monday, November 16, 2009

Mojo and Squash Chips

I lost my scrapping mojo for a while. Thought it would never come back. I would look at paper and ask myself what is so great about scrapping. It's just paper. The problem is I am not allowed to quit scrapping. That cannot occur, while I am sitting with sixteen cubic feet of gorgeous, lickable pattern paper. I started cleaning. Not in hopes of quitting scrapbooking. I just needed to get in control of what I have. Honestly, this could take a year. I did manage to go through all my paper and donated a load to a local preschool. I am now down to one cube of paper. I feel naked. It's quite liberating. HA! Whatever you do...do NOT imagine that image.

With the liberating I found a little scrap mojo.

The following two were done with the November Studio Calico Kit. I dragged out the typewriter I received when I graduated high school. Yeah cool....I'm old. Do they even make typewriters anymore or do scrappers only find them in old relatives basements or at antique shops?


A few layouts for the One Year baby scrapbook that I am making my cousin. These will always be very simple layouts with no or little journaling. I am keeping it blank, so she can write in it. I just have to say that my Baby Cousin is adorable. OK...I can say that without sounding like an uppity braggart, because: 1) it is true; and 2) it's true. ;o)

Finally, Barb had a recipe challenge on her Cook. Eat. Repeat? blog. Use squash. Ugh. OK...I don't eat squash, but I like recipes, I like challenges and I like Barb. As usual, I waited until the last minute to attempt my challenge. I was going to make this recipe: Spinach and Butternut Squash Lasagna . The photo in the issue of Cooking Light made it look scrumptious - even with the spinach and squash. Anyway...that didn't happen, because I started making my recipe three hours before deadline. Instead, I made squash chips from a recipe I dreamed about. True. I dream recipes. Here it is:

Cut a butternut squash in half without chopping off your fingers. Use a spoon to remove the seeds. Use a vegetable peeler and remove peel. All the while complain that squash smells gross like pumpkins. Dig out the three year old unused mandolin you bought from Pampered Chef. Learn how to use it. With mandolin over bowl cut the squash into approximately 1/8" thick slices. When done sprinkler with vegetable oil. Lay slices in a single layer on a cookie sheet that has been sprayed with non-stick spray. You may not need to use the spray, but I wasn't sure and didn't want it to stick. Sprinkle with salt and pepper. Here's where I went a little wrong. I didn't watch them and burned a portion. Oh well. Bake at 400 degrees for 20-25 minutes or until crispy.

The result: Num. That is coming from a non-squash eater, so trust me it is good. Sweeter than a potato chip. Similar in taste to sweet potato fries, but in crispy chip form. The other 1/2 of the squash will be used to make more.

I missed the deadline, but thought I would share anyway. Here's a photo of the unburned ones:

If I fail to check in before Thanksgiving, I wish you a very a very happy day surrounded by family, friends and delicious food. Maybe a squash chip or two. :o)

Tuesday, November 3, 2009

BASB Challenge: Simple Thanks

Yesterday I mentioned that the new BASB challenge is now posted. LaVerne's challenge is called Simple Thanks and it is pretty awesome. I did my ATC/tag for day one and have posted it below. I was riding high on a thankful buzz yesterday. Day one encompasses everything good. Part of the challenge was to list a pay it forward on the back of the ATC. I do have one, but today I am not thankful for shaky hands. The photo was a blur. Much like my life at times.


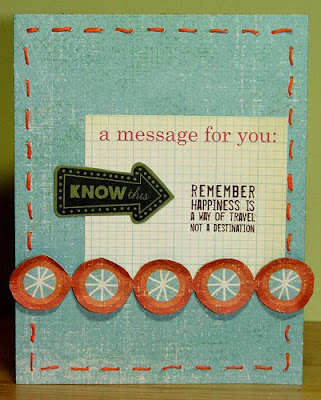
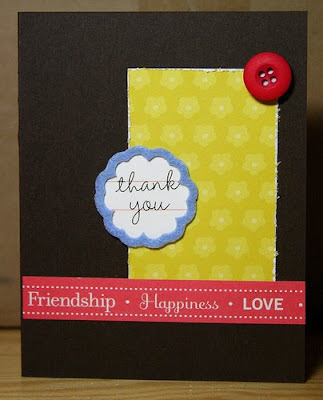
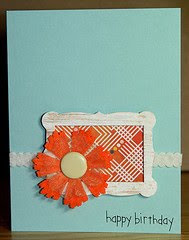
I want to share one more thing today. Last week I learned about Operation Write Home from Greta and knew that I wanted to participate. Not only was it a great way to support the troops, but also a sure fire way to use up a bunch of my overloaded and ever growing supply pile. Surprisingly, I made yesterday's holiday card deadline. Amazing. Below are examples of some of the cards I sent. I did multiples of a few of them. The first one I made the most - almost two dozen. I got on a roll and had an assembly line going. You can't tell from the photo, but the chimney is pop dotted and Santa is stamped under. I like the dimension. I missed the SC pop dot challenge by one day. Well, the cards were done, but the photo wasn't. See why it was amazing that I made that send deadline? LOL!


The following ones were super easy. Cut paper scraps. Slap on a sticker. Scratch on a rub on. Blah blah blah. I like them, but it is embarrassing that they are that simple. I always compare myself to people that do layer upon layer of creating. I have to stop that. That will never be my style, but I love it and strive to be like that one day.


And that ends the fun for today. Well, blog-wise. ;o)

Monday, November 2, 2009

Being Thankful


I'm too selfish and into myself. I need to be reminded that the world doesn't always have to revolve around me. Well, it should 42.3% of the time, but I need to share the rest. Snort! OK...seriously, I need to work harder on being thankful and to appreciate the things and people in my life more. So...welcome to November. This is the month and year that I will work on being thankful. I am officially pushing aside my "eye rolling" attitude. Today I am thankful for yellow leaves with sunshine. My twelve year old nephew, who helped me rake up a "butt load" of leaves. I am thankful he is not lazy, like me. I am thankful for not having to be to work until noon and daylight savings making the morning feel even longer. Oh and I am even thankful for the pool in my backyard that needs it's cover drained even though I really want to sit on my behind and do nothing.

So what brought this urgency to feeling thankful? It was LaVerne's BASB Challenge. When I read it a light went off in my head. Oh and no....my head isn't empty despite what some say. But I digress. Her challenge is thinking of things that make you happy and thankful. Document it and think of a way to pay it forward. Honestly, the light really did go off and I realized I needed to take stock in what I have and quit whining about what I don't.

It must be Monday as I am being hard on myself, but that's ok. I'm thankful I have someone to kick me in the behind - even if it is myself as I have scared everybody else away from even trying. LOL!

Have a gorgeous Monday. I hope it is filled with lots of things to appreciate. I am heading out to appreciate the draining of the pool cover. Tomorrow I will post my first ATC for LaVerne's challenge. I am so excited. Truly.


Tuesday, October 27, 2009

Justifying the Kit Purchase


I had to justify ordering the November Studio Calico kit. Reveal day is today in exactly 54 minutes. Justifying meant making a layout using the October kit that is currently sitting in my scrap area unused. OK...you can laugh now, since the layout above is the result. Yep...I used two sheets of paper out of a box filled to the brim with goodies. Oh well....here I come November!

Friday, October 23, 2009

Long Time No Blog.

I haven't been doing much creating lately. I'm not sure if it is the rainy, cold weather or the multitude of good ghost shows on television that is to blame. Probably the television. I started a layout a couple of weeks ago for a self-challenge Waleska conjured up. Her suggestion to rid our hoard of scrap supplies was to make a layout/card using a Maya Road's mini album, Studio Calico FabRips and Studio Calico stamps. Behold the creation:


It also fits the current blog challenge for Studio Calico of using texture on a layout. Two weeks to fulfill two challenges. I guess I am doing better than I thought.

Wednesday, October 7, 2009

Them 2009.....Ahhhh

After a weekend of no creating I woke up Monday morning raring to go. Good thing my Jeep needed fixin' and I had taken off the day to deal with that. This is what I did before my sister picked me up at noon to go terrorize the city:


I don't usually make minis. They challenge my idle brain too much. I am happy with the outcome even if Jake's page went askew. Who said everything had to be perfect anyway, right? I did. I will be re-doing that page at some point. Probably when Jake is 29. That's the way I seem to roll.

Monday, October 5, 2009

Excuses...Excuses

So in between watching two games of soccer.

A trip to the apple orchard where we were soaked head to toe by rain..


A visit to the pumpkin house.


A practice session of trick or treating.


I failed at even attempting the challenge I gave myself last Friday. The one where I thought it was possible to use up a whole scrap kit. I'm laughing at my high expectations. I must have been high on sugar from my Sonic Lime Slush to even think that was possible. Whatever. So the weekend was a bust creativity-wise, but I did manage to do a challenge.

Barb is holding a breakfast challenge on her blog, Cook. Eat. Repeat? Basically, find a new recipe, make it, photograph it and blog about it. On Saturday night I headed to the grocery store with the following recipe in my hand:

French Toast Soufflé
10 cup (1-inch) cubed sturdy white bread
(such as Pepperidge Farm Hearty White, about 16 (1-ounce) slices)

Cooking spray
1 (8-ounce) block 1/3-less-fat-cream cheese, softened
8 large eggs
1 1/2 cups 2% reduced-fat milk
2/3 cup half-and-half
1/2 cup maple syrup
1/2 teaspoon vanilla extract
2 tablespoons powdered sugar
3/4 cup maple syrup

Place bread cubes in a 13 x 9-inch baking dish coated with cooking spray. Beat cream cheese at medium speed of mixer until smooth. Add eggs, 1 at a time, mixing well after each addition. Add milk, half-and-half, 1/2 cup maple syrup, and vanilla, and mix until smooth. Pour cream cheese mixture over top of bread; cover and refrigerate overnight.

Preheat oven to 375°.

Remove bread mixture from refrigerator; let stand on counter for 30 minutes. Bake at 375° for 50 minutes or until set. Sprinkle the souffle with powdered sugar, and serve with maple syrup.

Cooking Light, APRIL 2000

I bought all the items I needed:

and a back up just in case of an emergency:

Despite the fire alarms going off (seriously) and me remembering that I really am not a huge fan of french toast, the recipe was very good. I served it with a side of ham and forgot that breakfast should have a beverage other than water.

Here's what the souffle looked like when plated up:
I did make a change to the recipe. I used regular cream cheese. It's what I had in the fridge and I wanted to use it up. If I changed anything about the recipe, I would either add cinnamon to the wet ingredients or I would make it with cinnamon bread. To me it needed just an oomph of something, but that seems to be just me as everyone else loved it as is.

Even Miss Scream.

Friday, October 2, 2009

BASB Challenge: Photo Mix Up


Hey everyone! It's my turn to host the BASB challenge. In summary, I am challenging you to make a creation using a mixture of color and black & white photo(s). You have the option on how many photos you include. If you are a superstar at editing and want to do one black & white with spot coloring, go for it. You put whatever spin on the challenge you wish. If you are interested in playing along, just leave a link to your layout in the comment area of the BASB blog. The prize will be a $15 gift certificate to Studio Calico. Deadline is midnight on October 14 and a winner will be drawn on October 15.

Other than that it is also self-challenge Friday. This weekend I will be focusing on depleting my stockpile of kits. It just happens that tomorrow is World Card Making Day and I am going to attempt to make a ton of cards while using up at least one kit. We'll see how that goes. I have to admit I never knew a day like this existed. The things I learn. LOL!. Check out Caardvarks for their day long festivities. I will be there off and on throughout the day for a bit of inspiration.

Here's hoping you have a very merry card making day.

Wednesday, September 30, 2009

More Flower Power


For my big self challenge on flowers I only came up with two layouts and one card, which I find pretty sad. Problem is it is fall and all I really want to do is jump in big old pile of leaves. Not that the leaves have fallen yet. Nope. I just find it necessary to prepare for that time by spending extra time jumping on the trampoline. I need to work on getting more air.

Tuesday, September 29, 2009

Flower Power

I am finally able to bend my fingers. It's a dang miracle. I don't like to whine, but today that seems to be all I am doing. So I finally got back to taking aqua aerobics after being a LOAD for nine months. What a mistake taking that time off was. Every muscle in my body disintegrated into shriveled strings of goo and is now revolting. I used to think aqua aerobics was kind of wussy. I still loved it, but I had a "nose up in the air" attitude about it. I loved being the youngest, most flexible and in shape person there. Not anymore. Those seventy year olds are making me eat their dust (or I should say splashes). Ugh.

So let's quit the whining. Below you will find one of my flower challenge layouts. I love it, because I used the Jenni Bowlin rub-on that I never thought I would use. Honestly, how awesome am I? Don't answer that. Let me live in my little world of Denise denial.


That's it for today. Thanks so much for stopping by. I am now heading back to my reclined position. I'm not going to whine, but could someone please bring me an ice pack and a Tylenol? ;o)

Saturday, September 26, 2009

Caardvarks' Sketchfest

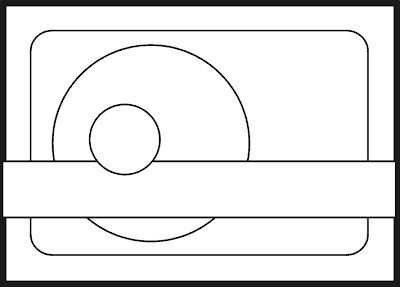
This week I have been joining in on the SketchFest held at Caardvarks. For each of the last seven days a sketch has been provided and your were to make a card based on the sketch. I've been having fun playing along. Today is the final day and here is the sketch provided:


And here is my take on their sketch:


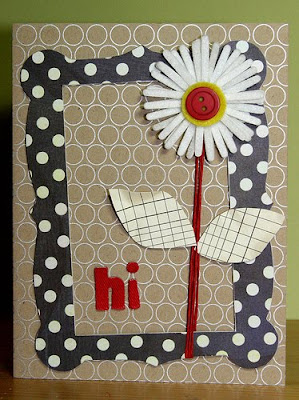
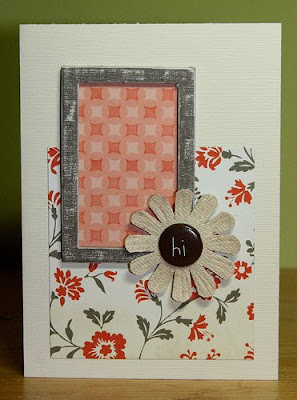
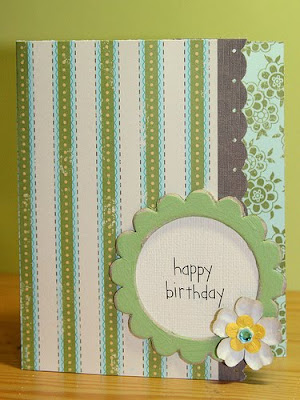
And here are the other six I made throughout the week based on sketches you can find on their site: